

This recipe for eggless ladyfinger cookies is fully vegan and creates a deliciously crisp biscuit, perfect in tiramisu or served with coffee. Ladyfinger cookies take some work to make vegan, but the results are worth the effort, especially if you use the cookies for a rich and delicious vegan tiramisu!

This post contains affiliate links (including Amazon Associates) and I earn from qualifying purchases.
Are Ladyfingers Vegan?
Most ladyfinger cookie recipes or store-bought options are not vegan. I’ve never come across a store-bought vegan ladyfinger cookie and there are very few recipes for this type of cookie.
Ladyfinger cookies rely heavily on eggs for their texture (crisp yet light and airy). It’s possible to replace eggs, but there’s a few steps required!
Ladyfingers are commonly used to create tiramisu, which is exactly what I like to use this recipe for. They can also be enjoyed with a cup of coffee or tea.
Ingredients to Make Eggless Ladyfingers
While I try to keep my ingredient lists simple with items I know are easy to find, this recipe calls for a few less-common vegan alternatives. It’s likely you can find all this at a typical grocery store, you may even have everything on hand!
I also usually provide ingredient substitutions but with a slightly tricky baking recipe like this, I’d highly recommend following the ingredient list exactly.
- Aquafaba: Traditional ladyfinger cookies use whipped egg whites to create an airy, delicate texture. The easy vegan replacement for whipped egg whites is aquafaba, the liquid from a can of chickpeas. Buy no salt added chickpeas because you’ll want to avoid salt in your cookies!
- Cream of tartar: To help hold the whipped texture of aquafaba, cream of tartar is the key ingredient. This is essential for keeping aquafaba fluffy which makes for a lighter texture in the ladyfingers.
- Sugar: Since these are cookies, we need sugar for sweetness and to cover up the aquafaba flavor (which has a distinctly savory, chickpea flavor even with a no salt added can). Some of the sugar is whipped into the aquafaba while the rest is whipped into margarine.
- Vegan margarine: I found margarine worked better than a vegan butter substitute with this recipe. The softer margarine texture makes it easier to whip into a fluffy texture along with sugar. If you want to use a vegan butter substitute, make sure it’s at room temperature and completely softened (not cold at all) before using.
- Vanilla extract: Ladyfingers are a fairly simple cookie in terms of flavor. The primary flavoring in this biscuit is vanilla extract!
- All purpose flour: For a light, fluffy texture, sifted all purpose flour is the perfect choice.
- Corn starch: Some corn starch helps create the right texture in these cookies.
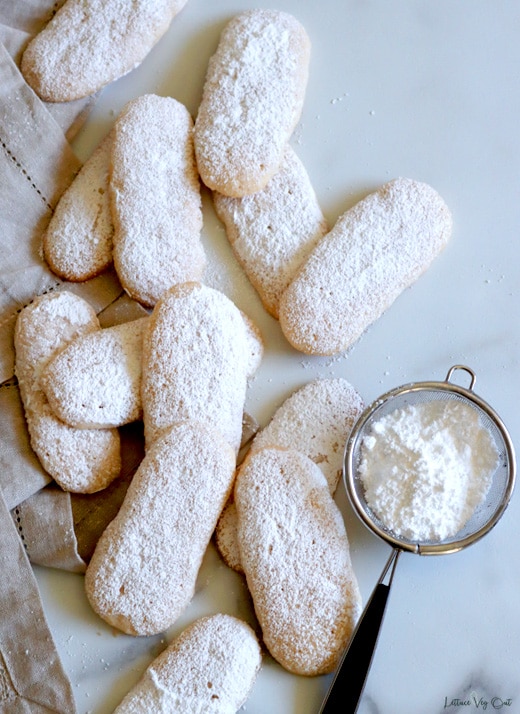
- Icing sugar: It’s optional to dust the tops of the ladyfingers with icing sugar. This is only if you plan to serve your vegan ladyfingers as-is. If you’re using the ladyfingers to create an eggless, vegan tiramisu, don’t add icing sugar to the tops of the ladyfingers.
How to Make Ladyfinger Biscuits without Eggs
Eggs are a critical ingredient in traditional ladyfinger recipes. Replacing them may seem impossible, but with a few unique ingredient swaps, anyone can enjoy egg free vanilla sponge biscuits!
This recipe requires a light touch and lots of whipping. A stand mixer is very helpful, but you can use a hand-held electric mixer instead.
Step 1: Whip Aquafaba
The first step is measuring aquafaba. I use a 19-ounce can of no salt added chickpeas which produces at least ½ cup of aquafaba. That amount is perfect for this recipe.
Pour the aquafaba into a stand mixer bowl with a whisk attachment and whip the aquafaba for 3-4 minutes, until it’s white and fluffy.
Stop mixing, scrape down the edges and add the cream of tartar.
Return to whipping the aquafaba at high speed and very slowly pour in ¼ cup of granulated sugar. Pour the sugar in extremely slowly; the ¼ cup should take at least a full minute to pour in (it feels like a long time when doing it).
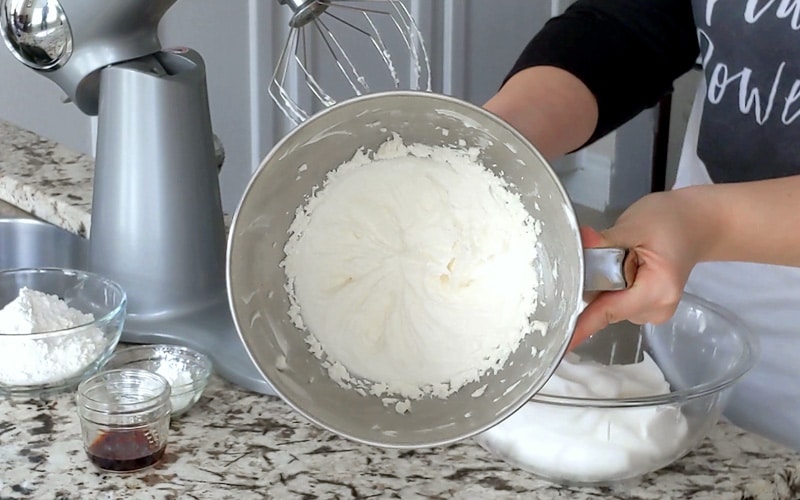
After the sugar is in, stop mixing so you can scrape down the edges of your bowl before resuming whipping the aquafaba at high speed for another 1-2 minutes. The aquafaba should be very white and fluffy at this point and hold its shape.
Remove the whipped aquafaba into a large mixing bowl.
Step 2: Whip Vegan Margarine
Add the margarine and remaining sugar into your stand mixer bowl with whip attachment. Slowly increase the whipping speed until you’re at full power and whip the margarine until it becomes lighter in color and appears fluffier.
You’ll need to stop once or twice to scrape the edges of the bowl and scrape up margarine from the bottom so it all becomes whipped.
Next, add the vanilla extract and whip once again, until incorporated.
At this point, carefully add ¼ of the whipped aquafaba and whip this into the margarine at high speed for about 1 minute.
Stop, scrape down the edges of the bowl and add in another ¼ of the whipped aquafaba (about ⅓ of the aquafaba that is left; the goal is to add about half the aquafaba into the margarine). Whip once again until everything is incorporated.
Step 3: Fold Ingredients Together
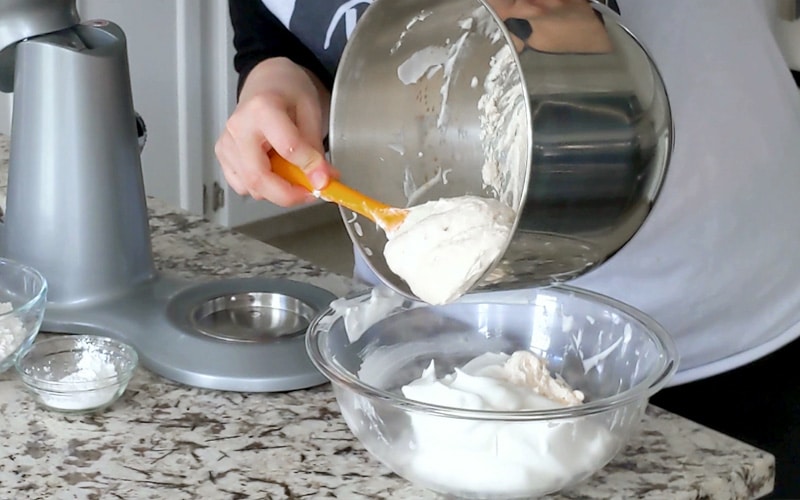
Scrape the margarine-aquafaba mixture into the mixing bowl with the remaining whipped aquafaba. Begin folding these mixtures together, with the lightest touch possible. This recipe relies on the whipped aquafaba to hold its fluffy texture since nothing else is used to create a fluffy ladyfinger cookie.
Once the margarine and aquafaba is partially folded, sift in the corn starch and ¾ C of flour. Begin carefully folding these dry ingredients into the whipped aquafaba-margarine.
Once this is partially mixed, sift in the remaining flour. Fold very gently until the flour is completely mixed in and there are no dry clumps of flour visible. Stop mixing as soon as you reach this point.
Step 4: Pipe and Bake
Prepare a piping bag with a ½ inch round tip. If you don’t have this tip, simply cut a ½ inch hole into the bottom of your bag after it’s filled.
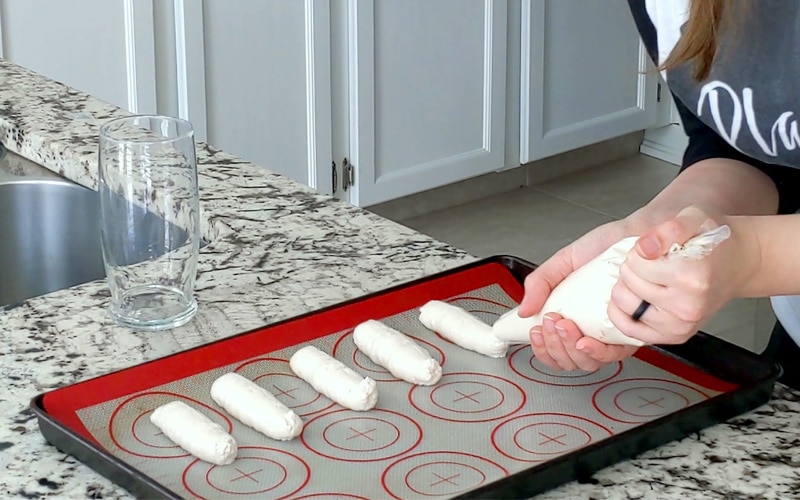
Fill the piping bag with ladyfinger batter. The easiest way is to place the piping bag in a tall glass and fold the top of the bag over the edge of the glass.
It’s okay if you can’t fit all the batter in at once. Simply pipe half the ladyfingers before refilling the bag, then continue.
Prep a baking tray by covering it with a silicone baking mat or parchment paper.
Carefully pipe the ladyfinger cookies so they’re about ¾ inches wide and 3-4 inches long. Leave at least an inch or two of space between the cookies.
Once you’ve piped the ladyfingers, bake them in an oven preheated to 350 °F for 17-20 minutes, until the bottoms are slightly golden brown.
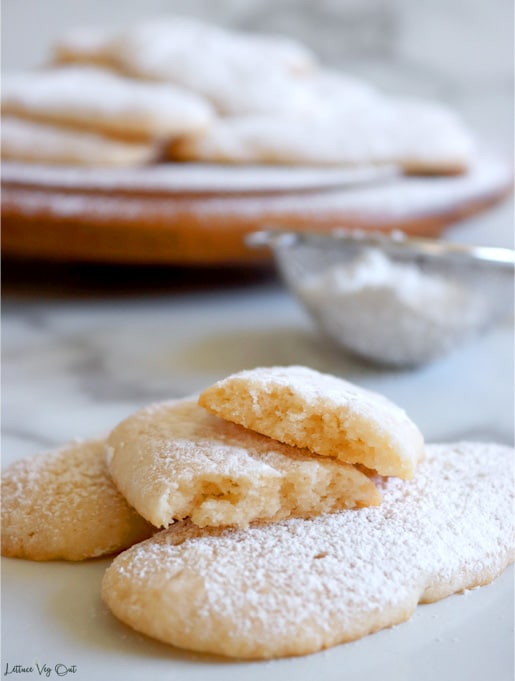
The shorter cooking time (17 minutes) creates a texture that’s still soft in the center, more like a sponge biscuit. The longer cooking time (20 minutes) creates a crunchier cookie. If you plan to make tiramisu, cook for the full 20 minutes because a crisp ladyfinger holds together better in that dessert. If you’re eating as-is, cook to your desired texture!
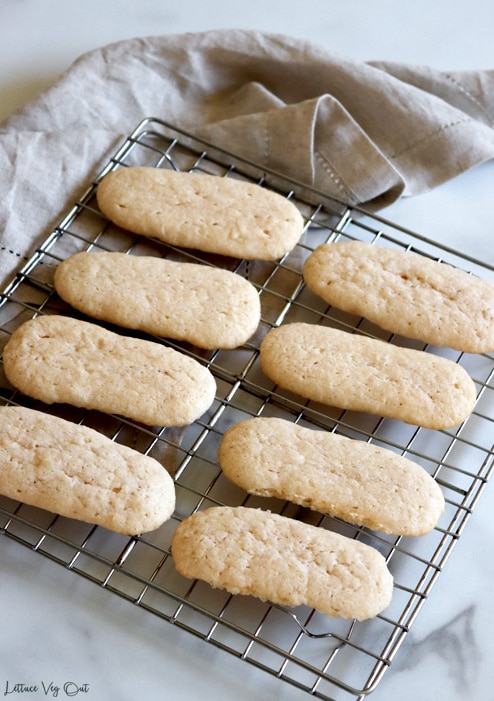
Step 5: Cool and Serve
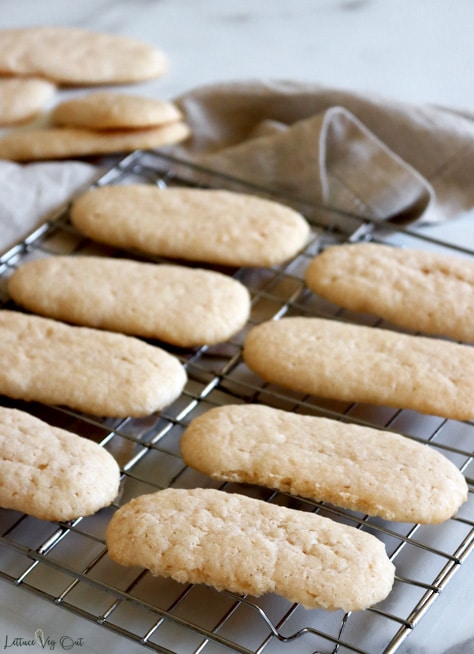
When the ladyfingers come out of the oven, they’ll be quite soft. Let them rest for a minute or two on the baking tray before carefully transferring to a wire cooling rack to cool completely, about 2 hours.
The ladyfingers become firmer and crisp as they cool.
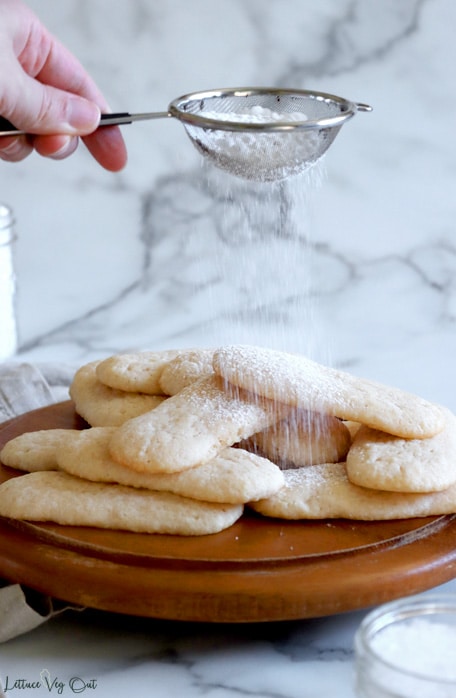
If serving as-is, dust the tops of your cookies with some icing sugar. If using for a tiramisu, leave as-is and proceed with that recipe!
How to Serve these Biscuits
These cookies are nicely sweet, perfect to serve with coffee or tea. Typically, ladyfinger cookies are used to make tiramisu so check out my vegan tiramisu recipe!
How to Store Leftover Ladyfingers
Leftover ladyfingers should be fully cooled before transferring into an airtight container. You can store them on a counter for up to 3 days. If you’d like to keep them up to a week, store in your fridge.
If using the ladyfingers for tiramisu, keep refrigerated.
📖 Recipe

Vegan Ladyfingers (Eggless)
Equipment
- Stand mixer (or electric hand-held beater)
- Piping bag (with ½ inch round tip)
- Silicone baking mat (or parchment paper)
Ingredients
Whipped Aquafaba
- ½ cup aquafaba (liquid from 19 oz/ 540 mL can of no-salt-added chickpeas)
- ¼ teaspoon cream of tartar
- ¼ cup sugar
Whipped Margarine
- ½ cup vegan margarine
- ½ cup sugar
- 2 teaspoons vanilla extract
- 1 ¼ cups all purpose flour
- 2 tablespoons corn starch
- icing sugar (optional)
Instructions
Step 1: Whip Aquafaba
- Open a can of no salt added chickpeas and drain the liquid into a measuring cup. One 19-ounce can should produce at least ½ cup aquafaba.½ cup aquafaba
- Pour the ½ cup aquafaba into a stand mixer bowl and turn onto the highest speed setting.
- Whip for 3-4 minutes, until the aquafaba becomes fluffy and white.
- Scrape the edges of the bowl and add cream of tartar. Return to whipping the aquafaba at your mixer’s highest speed setting.¼ teaspoon cream of tartar
- While whipping, very slowly pour in granulated sugar, about 1 tablespoon at a time. It should take about one minute to pour in.¼ cup sugar
- After all the sugar is in, scrape the edges of the bowl and whip for another 1-2 minutes until the aquafaba is a stiff foam (should hold its shape on the whisk head).
- Transfer the whipped aquafaba to a large mixing bowl.
Step 2: Whip Vegan Margarine
- Place vegan margarine into the bowl of the stand mixer along with some more sugar.½ cup sugar, ½ cup vegan margarine
- Whip, scraping the edges down a few times, until the margarine mixture has become fluffy and lighter in color.
- Next, add vanilla extract and whip until incorporated.2 teaspoons vanilla extract
- Once fluffy, carefully add ¼ of the whipped aquafaba and whip this in, on high speed, for about 1 minute. Stop whipping and scrape the edges down.
- Add another ¼ of the aquafaba (⅓ of the aquafaba remaining).
- Again, whip this second round of aquafaba into the margarine at high speed.
Step 3: Fold Ingredients Together
- Carefully transfer this whipped margarine-aquafaba mix into the mixing bowl with the remaining aquafaba. Slowly fold the ingredients together.
- When about half mixed, sift in corn starch and about half of your all-purpose flour.2 tablespoons corn starch, 1 ¼ cups all purpose flour
- Once this is about half mixed in, sift in the remaining all-purpose flour.
- Fold extremely carefully to allow the batter to hold its whipped in air content.
Step 4: Pipe and Bake
- As soon as there’s no clumps of dry flour left in the batter, stop mixing.
- Transfer this mixture into a piping bag with a ½ inch round tip (if you don’t have this tip, just cut a ½ inch hole into a piping bag).
- Prep a baking tray by covering it with parchment paper or a silicone baking mat.
- Pipe the ladyfingers onto the baking tray. They should be about ¾ inches wide and 3 ½ inches long; and at least 1 ½ inches apart.
- When all the batter is piped, place the baking tray into an oven preheated to 350 °F.
- Bake for 17-20 minutes, until the bottoms of the cookies are very lightly browned.
Step 5: Cool and Serve
- The cookies will be quite soft straight out of the oven. Let the cookies rest on the baking tray for about 2 minutes, then carefully transfer to a wire cooling rack.
- As the cookies cool, they will firm and become crunchy in texture.
- Once cooled, serve your ladyfingers or use them in a tiramisu! If using for tiramisu, leave the ladyfingers as-is. If serving on their own, it’s optional to top with icing sugar (scoop a tablespoon or so into a wire strainer and sprinkle on top).icing sugar
Nutrition
More Vegan Snack Recipes
Like this recipe? You should also try:


About Nicole Stevens
Nicole is a long-time vegan with a Masters of Science in Food and Nutrition.
She helps people thrive on a vegan diet with balanced recipes.
Reply to comment